10주차 실습(3)-차트 만들기
Custom이라는 라이브러리를 활용해 볼 것이다.
그 안에서도 다양한 라이브러리들이 있는데, 차트를 위한 것으로는 MPAndroid Chart, EazeGraph 등이 있다.
EazeGraph를 먼저 사용해보자.
https://github.com/paulroehr/EazeGraph
GitHub - paulroehr/EazeGraph: An Android chart and graph library
An Android chart and graph library. Contribute to paulroehr/EazeGraph development by creating an account on GitHub.
github.com
만약 프로젝트를 하다가 모르는 게 생기면 라이브러리부터 찾아볼 수 있다. 만들어져 있는 것을 가져다 쓸 수도 있고, 그렇지 않으면 직접 커스텀 할 때 필요한 힌트를 얻을 수도 있다.
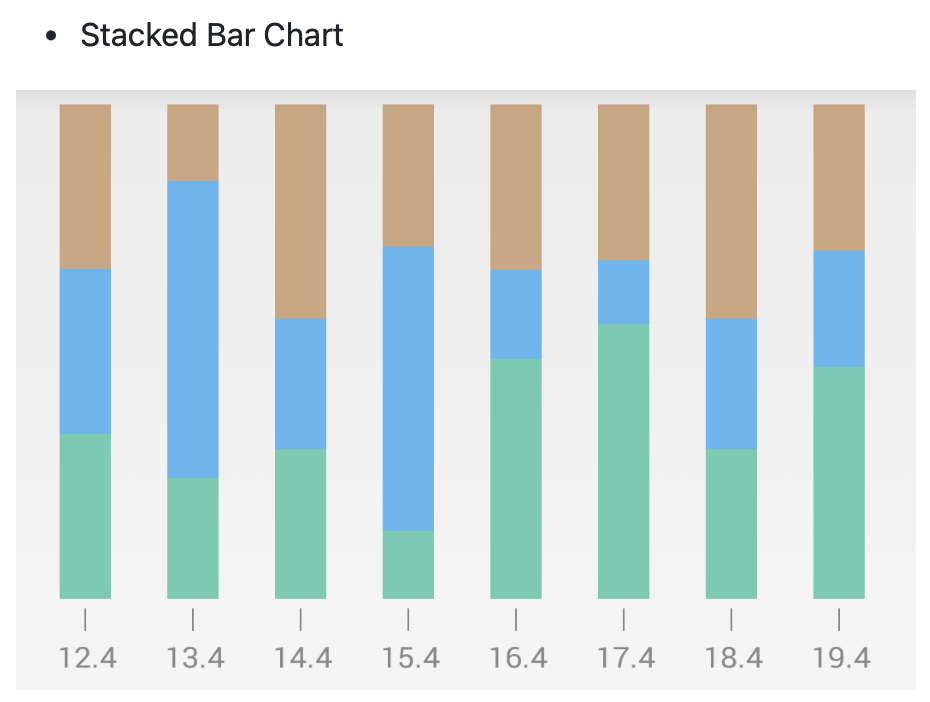
EazeGraph의 Stacked bar chart를 사용해보자.
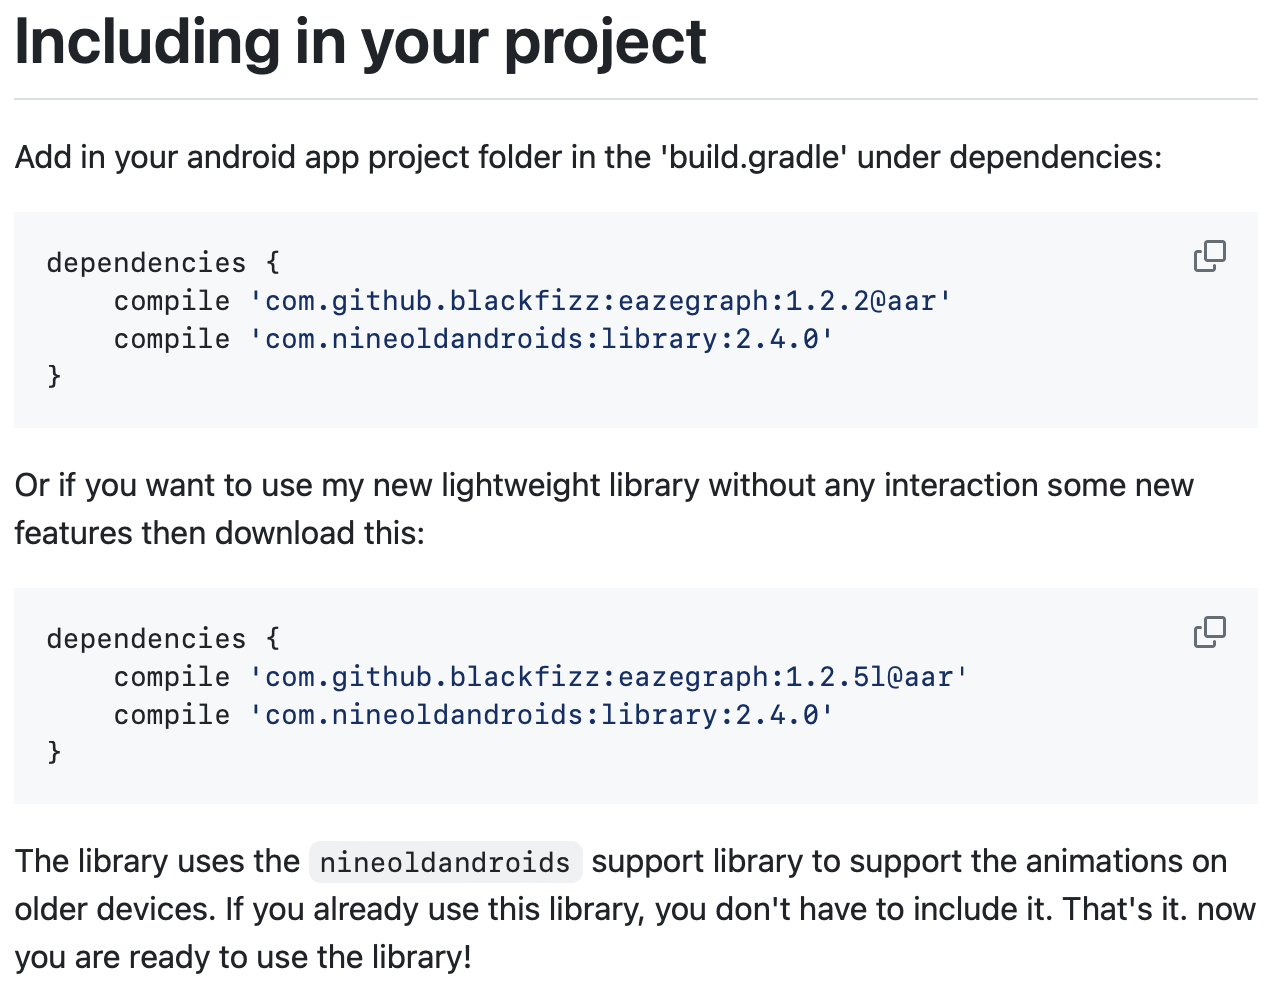
1. 사용 설정 및 dependency 추가
git에 올라온 것을 그대로 따라가보자. 다음과 같이 stacked bar chart 부분의 설정을 app 수준 gradle 파일에 넣어주자
이때 compile 은 deprecated 되었으니 implementation으로 바꿔주자.
2. xml 복붙

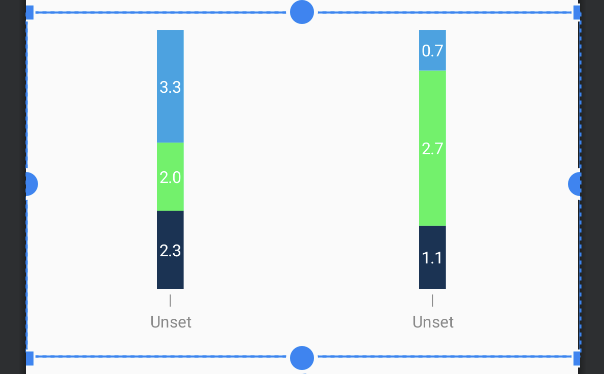
xml 복붙해오면 preview는 오른쪽 사진과 같이 뜬다.
egFixedBarWidth는 false로 하면 차트들이 여백 없이 꽉차게 된다.
egBarWidth는 차트들의 너비를 설정할 수 있다.
egLegendHeight는 오른쪽 사진 하단의 Unset이라고 적혀있는 '항목'의 높이를 설정할 수 있다.
3. 코드 복붙 및 수정
자세한 데이터 수정은 코드에서 하는 듯 보인다. 한번 살펴보자.
복붙해오면 kotlin으로 코드가 수정이 되고, findViewById만 binding코드로 바꿔서 다음과 같이 설정해주자.
class MainActivity : ComponentActivity() {
    lateinit var binding : ActivityMainBinding
    override fun onCreate(savedInstanceState: Bundle?) {
        super.onCreate(savedInstanceState)
        binding = ActivityMainBinding.inflate(layoutInflater)
        setContentView(binding.root)

        // 여기부터 가져온 코드
        val mStackedBarChart = binding.stackedBarChart

        val s1 = StackedBarModel("12.4")

        s1.addBar(BarModel(2.3f, -0x9c3450))
        s1.addBar(BarModel(2.3f, -0xa9480f))
        s1.addBar(BarModel(2.3f, -0x325981))

        val s2 = StackedBarModel("13.4")
        s2.addBar(BarModel(1.1f, -0x9c3450))
        s2.addBar(BarModel(2.7f, -0xa9480f))
        s2.addBar(BarModel(0.7f, -0x325981))

        val s3 = StackedBarModel("14.4")

        s3.addBar(BarModel(2.3f, -0x9c3450))
        s3.addBar(BarModel(2f, -0xa9480f))
        s3.addBar(BarModel(3.3f, -0x325981))

        val s4 = StackedBarModel("15.4")
        s4.addBar(BarModel(1f, -0x9c3450))
        s4.addBar(BarModel(4.2f, -0xa9480f))
        s4.addBar(BarModel(2.1f, -0x325981))

        mStackedBarChart.addBar(s1)
        mStackedBarChart.addBar(s2)
        mStackedBarChart.addBar(s3)
        mStackedBarChart.addBar(s4)

        mStackedBarChart.startAnimation()
    }
}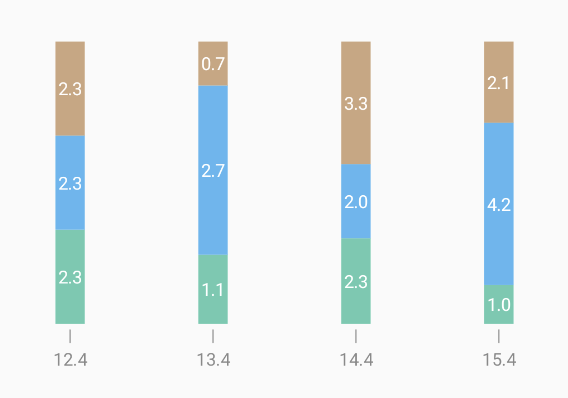
실행화면과 코드를 비교해보면,

이 부분은 항목의 이름이다.

addBar(BarModel(value, color)) 로 데이터와 색을 지정해서 각 항목의 ㅜ차트를 쌓아 올린다.
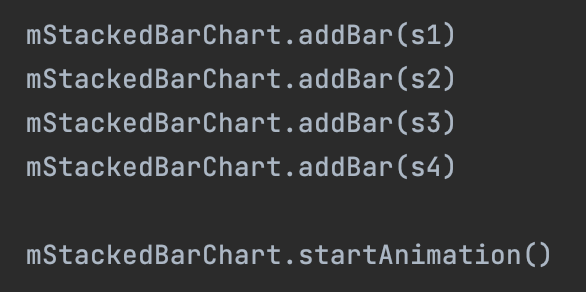
마지막에 항목들을 최종적으로 binding 해온 차트 객체에 addBar로 넣어준다.
startAnimation도 넣어줄 수 있다.
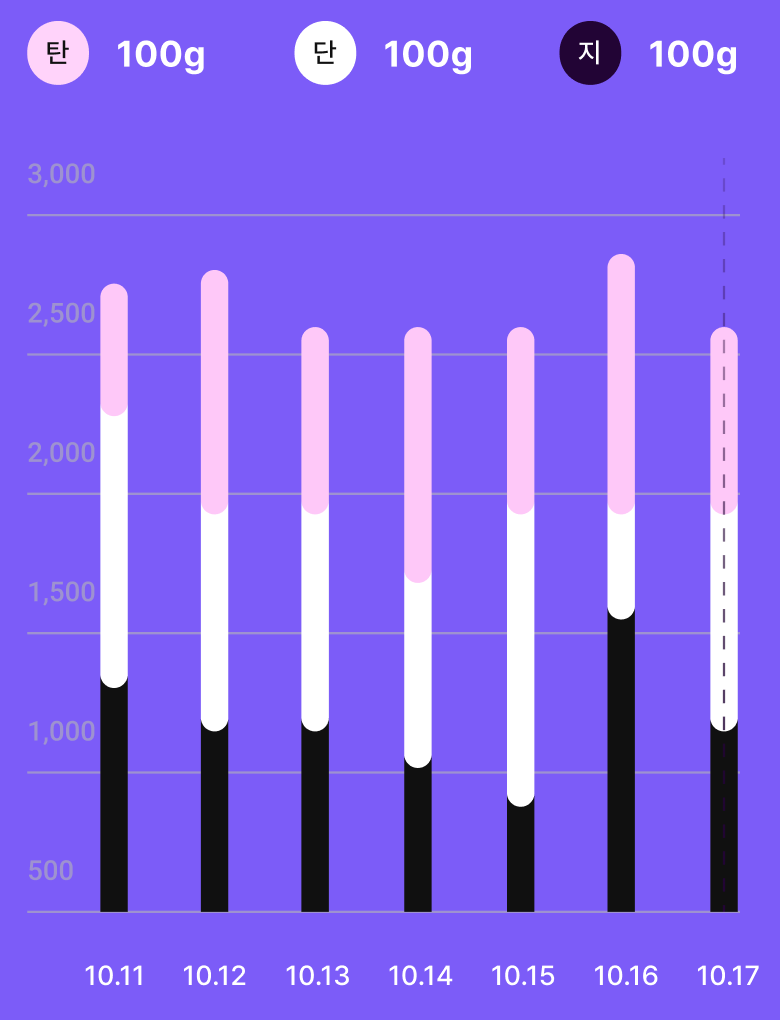
직접 만드는 것을 해보자

이런식으로 쌓아올린 그래프를 만들어볼것이다.
1. 수치선 레이아웃
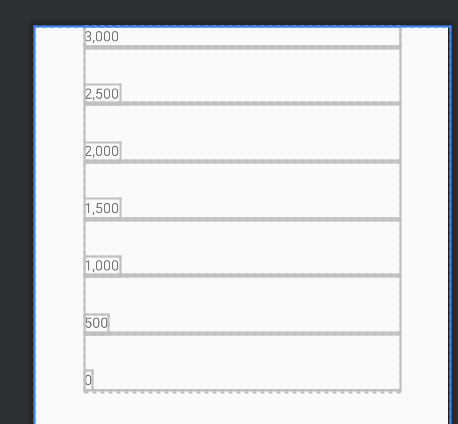
노가다로 위와 같은 레이아웃을 만들어보자
코드👇
<androidx.constraintlayout.widget.ConstraintLayout
    android:layout_width="312dp"
    android:layout_height="wrap_content"
    app:layout_constraintStart_toStartOf="parent"
    app:layout_constraintEnd_toEndOf="parent"
    app:layout_constraintTop_toTopOf="parent">

    <TextView
        android:id="@+id/tv_3000"
        android:layout_width="match_parent"
        android:layout_height="wrap_content"
        android:text="3,000"
        app:layout_constraintStart_toStartOf="parent"

        app:layout_constraintTop_toTopOf="parent"/>
    <View
        android:id="@+id/v_3000"
        android:layout_width="match_parent"
        android:layout_height="1dp"
        app:layout_constraintTop_toBottomOf="@id/tv_3000"
        app:layout_constraintStart_toStartOf="parent"

        android:background="#D0D0D0"/>
    <TextView
        android:id="@+id/tv_2500"
        android:layout_width="wrap_content"
        android:layout_height="wrap_content"
        android:layout_marginTop="36dp"
        android:text="2,500"
        app:layout_constraintStart_toStartOf="parent"

        app:layout_constraintTop_toBottomOf="@id/v_3000"/>
    <View
        android:id="@+id/v_2500"
        android:layout_width="match_parent"
        android:layout_height="1dp"
        app:layout_constraintTop_toBottomOf="@id/tv_2500"
        app:layout_constraintStart_toStartOf="parent"

        android:background="#D0D0D0"/>
    <TextView
        android:id="@+id/tv_2000"
        android:layout_width="wrap_content"
        android:layout_height="wrap_content"
        android:layout_marginTop="36dp"
        android:text="2,000"
        app:layout_constraintStart_toStartOf="parent"
        app:layout_constraintTop_toBottomOf="@id/v_2500"/>
    <View
        android:id="@+id/v_2000"
        android:layout_width="match_parent"
        android:layout_height="1dp"
        app:layout_constraintTop_toBottomOf="@id/tv_2000"
        app:layout_constraintStart_toStartOf="parent"

        android:background="#D0D0D0"/>
    <TextView
        android:id="@+id/tv_1500"
        android:layout_width="wrap_content"
        android:layout_height="wrap_content"
        android:layout_marginTop="36dp"
        android:text="1,500"
        app:layout_constraintStart_toStartOf="parent"
        app:layout_constraintTop_toBottomOf="@id/v_2000"/>
    <View
        android:id="@+id/v_1500"
        android:layout_width="match_parent"
        android:layout_height="1dp"
        app:layout_constraintTop_toBottomOf="@id/tv_1500"
        app:layout_constraintStart_toStartOf="parent"

        android:background="#D0D0D0"/>
    <TextView
        android:id="@+id/tv_1000"
        android:layout_width="wrap_content"
        android:layout_height="wrap_content"
        android:layout_marginTop="36dp"
        android:text="1,000"
        app:layout_constraintStart_toStartOf="parent"

        app:layout_constraintTop_toBottomOf="@id/v_1500"/>
    <View
        android:id="@+id/v_1000"
        android:layout_width="match_parent"
        android:layout_height="1dp"
        app:layout_constraintTop_toBottomOf="@id/tv_1000"
        app:layout_constraintStart_toStartOf="parent"

        android:background="#D0D0D0"/>
    <TextView
        android:id="@+id/tv_500"
        android:layout_width="wrap_content"
        android:layout_height="wrap_content"
        android:layout_marginTop="36dp"
        android:text="500"
        app:layout_constraintStart_toStartOf="parent"

        app:layout_constraintTop_toBottomOf="@id/v_1000"/>
    <View
        android:id="@+id/v_500"
        android:layout_width="match_parent"
        android:layout_height="1dp"
        app:layout_constraintTop_toBottomOf="@id/tv_500"
        app:layout_constraintStart_toStartOf="parent"
        android:background="#D0D0D0"/>
    <TextView
        android:id="@+id/tv_0"
        android:layout_width="wrap_content"
        android:layout_height="wrap_content"
        android:layout_marginTop="36dp"
        android:text="0"
        app:layout_constraintStart_toStartOf="parent"
        app:layout_constraintTop_toBottomOf="@id/v_500"/>
    <View
        android:id="@+id/v_0"
        android:layout_width="match_parent"
        android:layout_height="1dp"
        app:layout_constraintTop_toBottomOf="@id/tv_0"
        app:layout_constraintStart_toStartOf="parent"
        android:background="#D0D0D0"/>
</androidx.constraintlayout.widget.ConstraintLayout>
2. 막대그래프 레이아웃
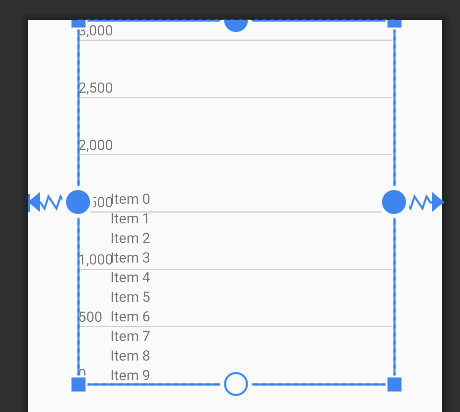
2-1. 리사이클러뷰 레이아웃
이번에는 리사이클러 뷰로 작성해보자.
<androidx.recyclerview.widget.RecyclerView
    android:id="@+id/rv_bar"
    android:layout_width="match_parent"
    android:layout_height="wrap_content"
    android:layout_marginStart="32dp"
    app:layout_constraintBottom_toBottomOf="parent" />
프리뷰는 다음과 같다.
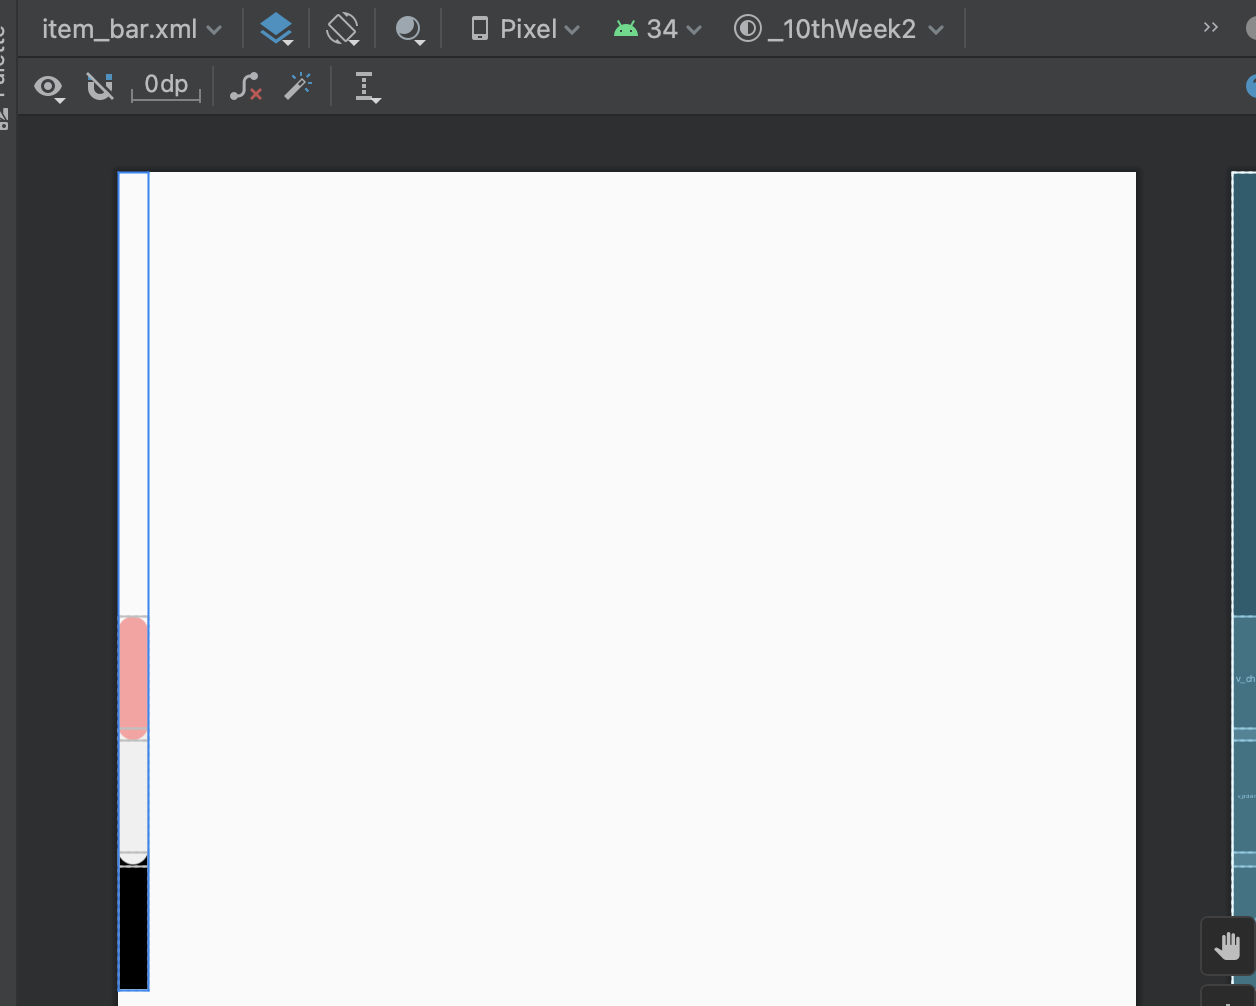
2-2. 아이템 레이아웃
위의 디자인을 참고해서
drawable에서 style을 다음과 같이 추가해준다.
// 네 모서리 모두 둥긂 -> 탄수화물
<?xml version="1.0" encoding="utf-8"?>
<shape xmlns:android="http://schemas.android.com/apk/res/android">
    <corners android:topLeftRadius="6dp" android:topRightRadius="6dp"
        android:bottomLeftRadius="6dp" android:bottomRightRadius="6dp"/>
</shape>

// 아래 모서리만 둥긂 -> 단백질
<?xml version="1.0" encoding="utf-8"?>
<shape xmlns:android="http://schemas.android.com/apk/res/android">
    <corners android:bottomLeftRadius="6dp" android:bottomRightRadius="6dp"/>
</shape>

// 지방은 둥글 필요가 없으므로 따로 style을 추가하지 않음
<?xml version="1.0" encoding="utf-8"?>
<androidx.constraintlayout.widget.ConstraintLayout xmlns:android="http://schemas.android.com/apk/res/android"
    android:layout_width="wrap_content"
    android:layout_height="330dp"
    xmlns:app="http://schemas.android.com/apk/res-auto">


    <View
        android:id="@+id/v_ch"
        android:layout_width="12dp"
        android:layout_height="50dp" // 가리는 부분 없으므로 50dp 그대로 다 보인다
        app:layout_constraintStart_toStartOf="parent"
        app:layout_constraintBottom_toTopOf="@id/v_protein"
        android:backgroundTint="#FFA0A0"
        android:background="@drawable/shape_bar"
        android:layout_marginBottom="-6dp"
        android:elevation="2dp"/>

    <View
        android:id="@+id/v_protein"
        android:layout_width="12dp"
        android:layout_height="56dp" // 탄수화물이 6dp 겹치므로 50dp 길이로 보일 것임
        app:layout_constraintStart_toStartOf="parent"
        app:layout_constraintBottom_toTopOf="@id/v_fat"
        android:backgroundTint="#F0F0F0"
        android:background="@drawable/shape_bar_protein"
        android:layout_marginBottom="-6dp"
        android:elevation="1dp"/>

    <View
        android:id="@+id/v_fat"
        android:layout_width="12dp"
        android:layout_height="56dp" // protein이 6dp 겹치므로 50dp 길이로 보일 것임
        app:layout_constraintStart_toStartOf="parent"
        app:layout_constraintBottom_toBottomOf="parent"
        android:background="@color/black"
        app:cardElevation="0dp"/>

</androidx.constraintlayout.widget.ConstraintLayout>
미리보기는 다음과 같다.
2-3. 어댑터 만들기
코틀린 파일 폴더클릭-Ctrl+N-New Kotlin Class/File
이름은 BarAdapter
2-3-1. BarAdapter.kt
boiler plate code👇
package com.iyr.a10thweek2

import android.view.ViewGroup
import androidx.recyclerview.widget.RecyclerView
import com.iyr.a10thweek2.databinding.ItemBarBinding

class BarAdapter : RecyclerView.Adapter<BarAdapter.ViewHolder>() {

    inner class ViewHolder(val binding : ItemBarBinding) : RecyclerView.ViewHolder(binding.root) {
        fun bind() {

        }
    }

    override fun onCreateViewHolder(parent: ViewGroup, viewType: Int): ViewHolder {
        TODO("Not yet implemented")
    }

    override fun getItemCount(): Int {
        TODO("Not yet implemented")
    }

    override fun onBindViewHolder(holder: ViewHolder, position: Int) {
        TODO("Not yet implemented")
    }
}
2-3-2. 데이터 클래스 만들어주기
항목(날짜)에 따라 각 수치(탄단지)가 몇인지 저장하는 데이터 클래스를 만들어주자
data class BarData( val fat : Int, val protein : Int, val ch : Int)
2-3-3. 다시 어댑터 수정
package com.iyr.a10thweek2

import android.view.LayoutInflater
import android.view.ViewGroup
import androidx.recyclerview.widget.RecyclerView
import com.iyr.a10thweek2.databinding.ItemBarBinding

class BarAdapter(var barList : ArrayList<BarData>) : RecyclerView.Adapter<BarAdapter.ViewHolder>() {

    inner class ViewHolder(val binding : ItemBarBinding) : RecyclerView.ViewHolder(binding.root) {
        fun bind(barData : BarData) {
            binding.vFat.layoutParams.height = barData.fat
            binding.vProtein.layoutParams.height = barData.protein
            binding.vCh.layoutParams.height = barData.ch
        }
    }

    override fun onCreateViewHolder(parent: ViewGroup, viewType: Int): ViewHolder {
        val binding = ItemBarBinding.inflate(LayoutInflater.from(parent.context), parent, false)
        return ViewHolder(binding)
    }

    override fun getItemCount(): Int {
        return barList.size
    }

    override fun onBindViewHolder(holder: ViewHolder, position: Int) {
        holder.bind(barList[position])
    }
}
LayoutParams(레이아웃 파라미터)란?👇
https://jungmonster.tistory.com/39
[Android] Layout Parameter
각 레이아웃별로 제공되는 레이아웃 파라미터Layout Parameter ViewGroup.LayoutParams layout_width, layout _height ViewGroup.MarginLayoutParams layout_marginLeft, layout_marginRight LinearLayout.LayoutParms layout_gravity, layout_weight Abso
jungmonster.tistory.com
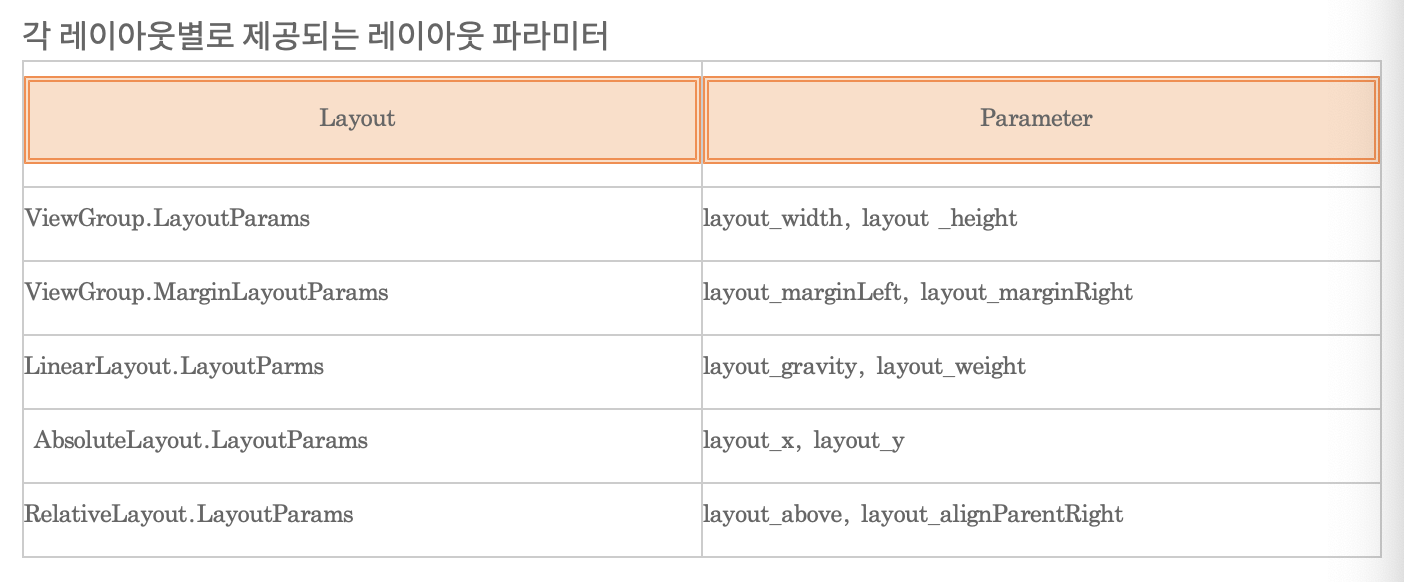
이러한 레이아웃 파라미터를 실행중에 속성을 변경 시켜 줄 수가 있다. 하지만 레이아웃 속성을 변경시키면 배치상태도 변해야 하기 때문에 디자인 타임에 한변 결정이 되면 왠만해서 바꾸지 않는다. 그래도 변경 시켜주어야 한다면 얼마든지 가능하다.
2-3-4. 어댑터 연결
다음과 같이 layoutManager로 리사이클러뷰가 가로로 쌓이도록 Horizontal로 설정을 해주고
어댑터에 데이터를 넣어서 연결해준다.
class MainActivity : ComponentActivity() {
    lateinit var binding : ActivityMainBinding
    override fun onCreate(savedInstanceState: Bundle?) {
        super.onCreate(savedInstanceState)
        binding = ActivityMainBinding.inflate(layoutInflater)
        setContentView(binding.root)

        binding.rvBar.layoutManager = LinearLayoutManager(this, LinearLayoutManager.HORIZONTAL, false)
        binding.rvBar.adapter = BarAdapter(
            arrayListOf(
                BarData(100,300,300),
                BarData(150,300,100),
                BarData(300,50,300),
                BarData(300,300,300),
                BarData(300,300,50),
                BarData(200,300,200),
                BarData(400,300,300)
            )

        )
    }
}
몇픽셀을 넣어야 할 지 감이 잘 안오면 'dp to px'이라고 구글링해볼 수 있다.
실행화면은 다음과 같다.
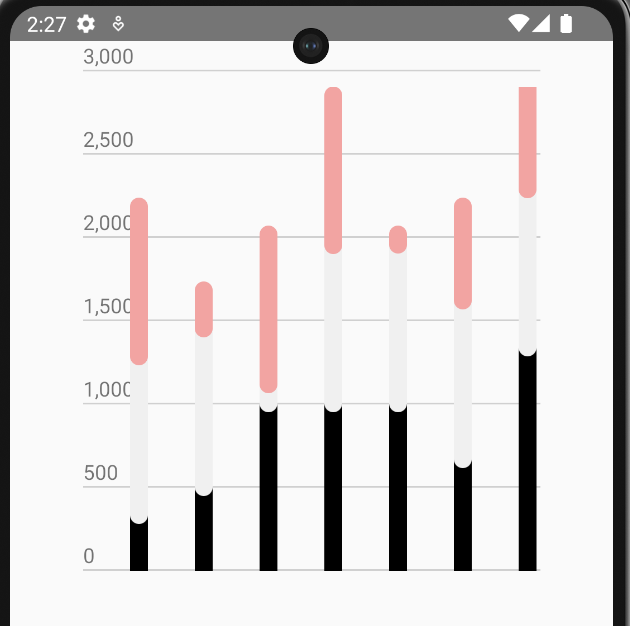
글자도 잘리고 범위를 벗어나는 그래프도 있다. 실제 프로젝트를 할 때는 잘 수정해주도록 하자.(최대값에 따라 축을 수정한다든지)